Showing posts with label embossing powder. Show all posts

Thursday, June 26, 2025

Just for you,

 Hi everyone,

Today I am sharing a card using a stamp set from the new Simon Says Stamp release called ‘Friend Like You’. The set has multiple sentiments suitable for any occasion.


I started by creating my background using a rectangle masking stencil so that I could have a clean white border for my card front.

I then applied another stencil over stop and blended on 3 different colours of Distress ink. Added splatters of black paint.

The red background layer to my card was created by using a new A5 embossing folder from Sizzix.


I stamped the sentiments with Versamark ink and heat embossed with white embossing powder.

I popped up the sentiments with foam tape and then added them to the front of my card.


Well that’s it for my card today and thanks so much for stopping by 🙏🏻

Supplies:

Simon Says Stamp EZ Strips Everyday stamp set
Tim Holtz / Stampers Anonymous Flourish stencil
Tim Holtz / Sizzix Botanical Large embossing folder
Taylored Expressions Rectangles Masking stencil
Ranger Distress inks - Wild Honey, Picked Raspberry, Mustard Seed


Saturday, July 09, 2022

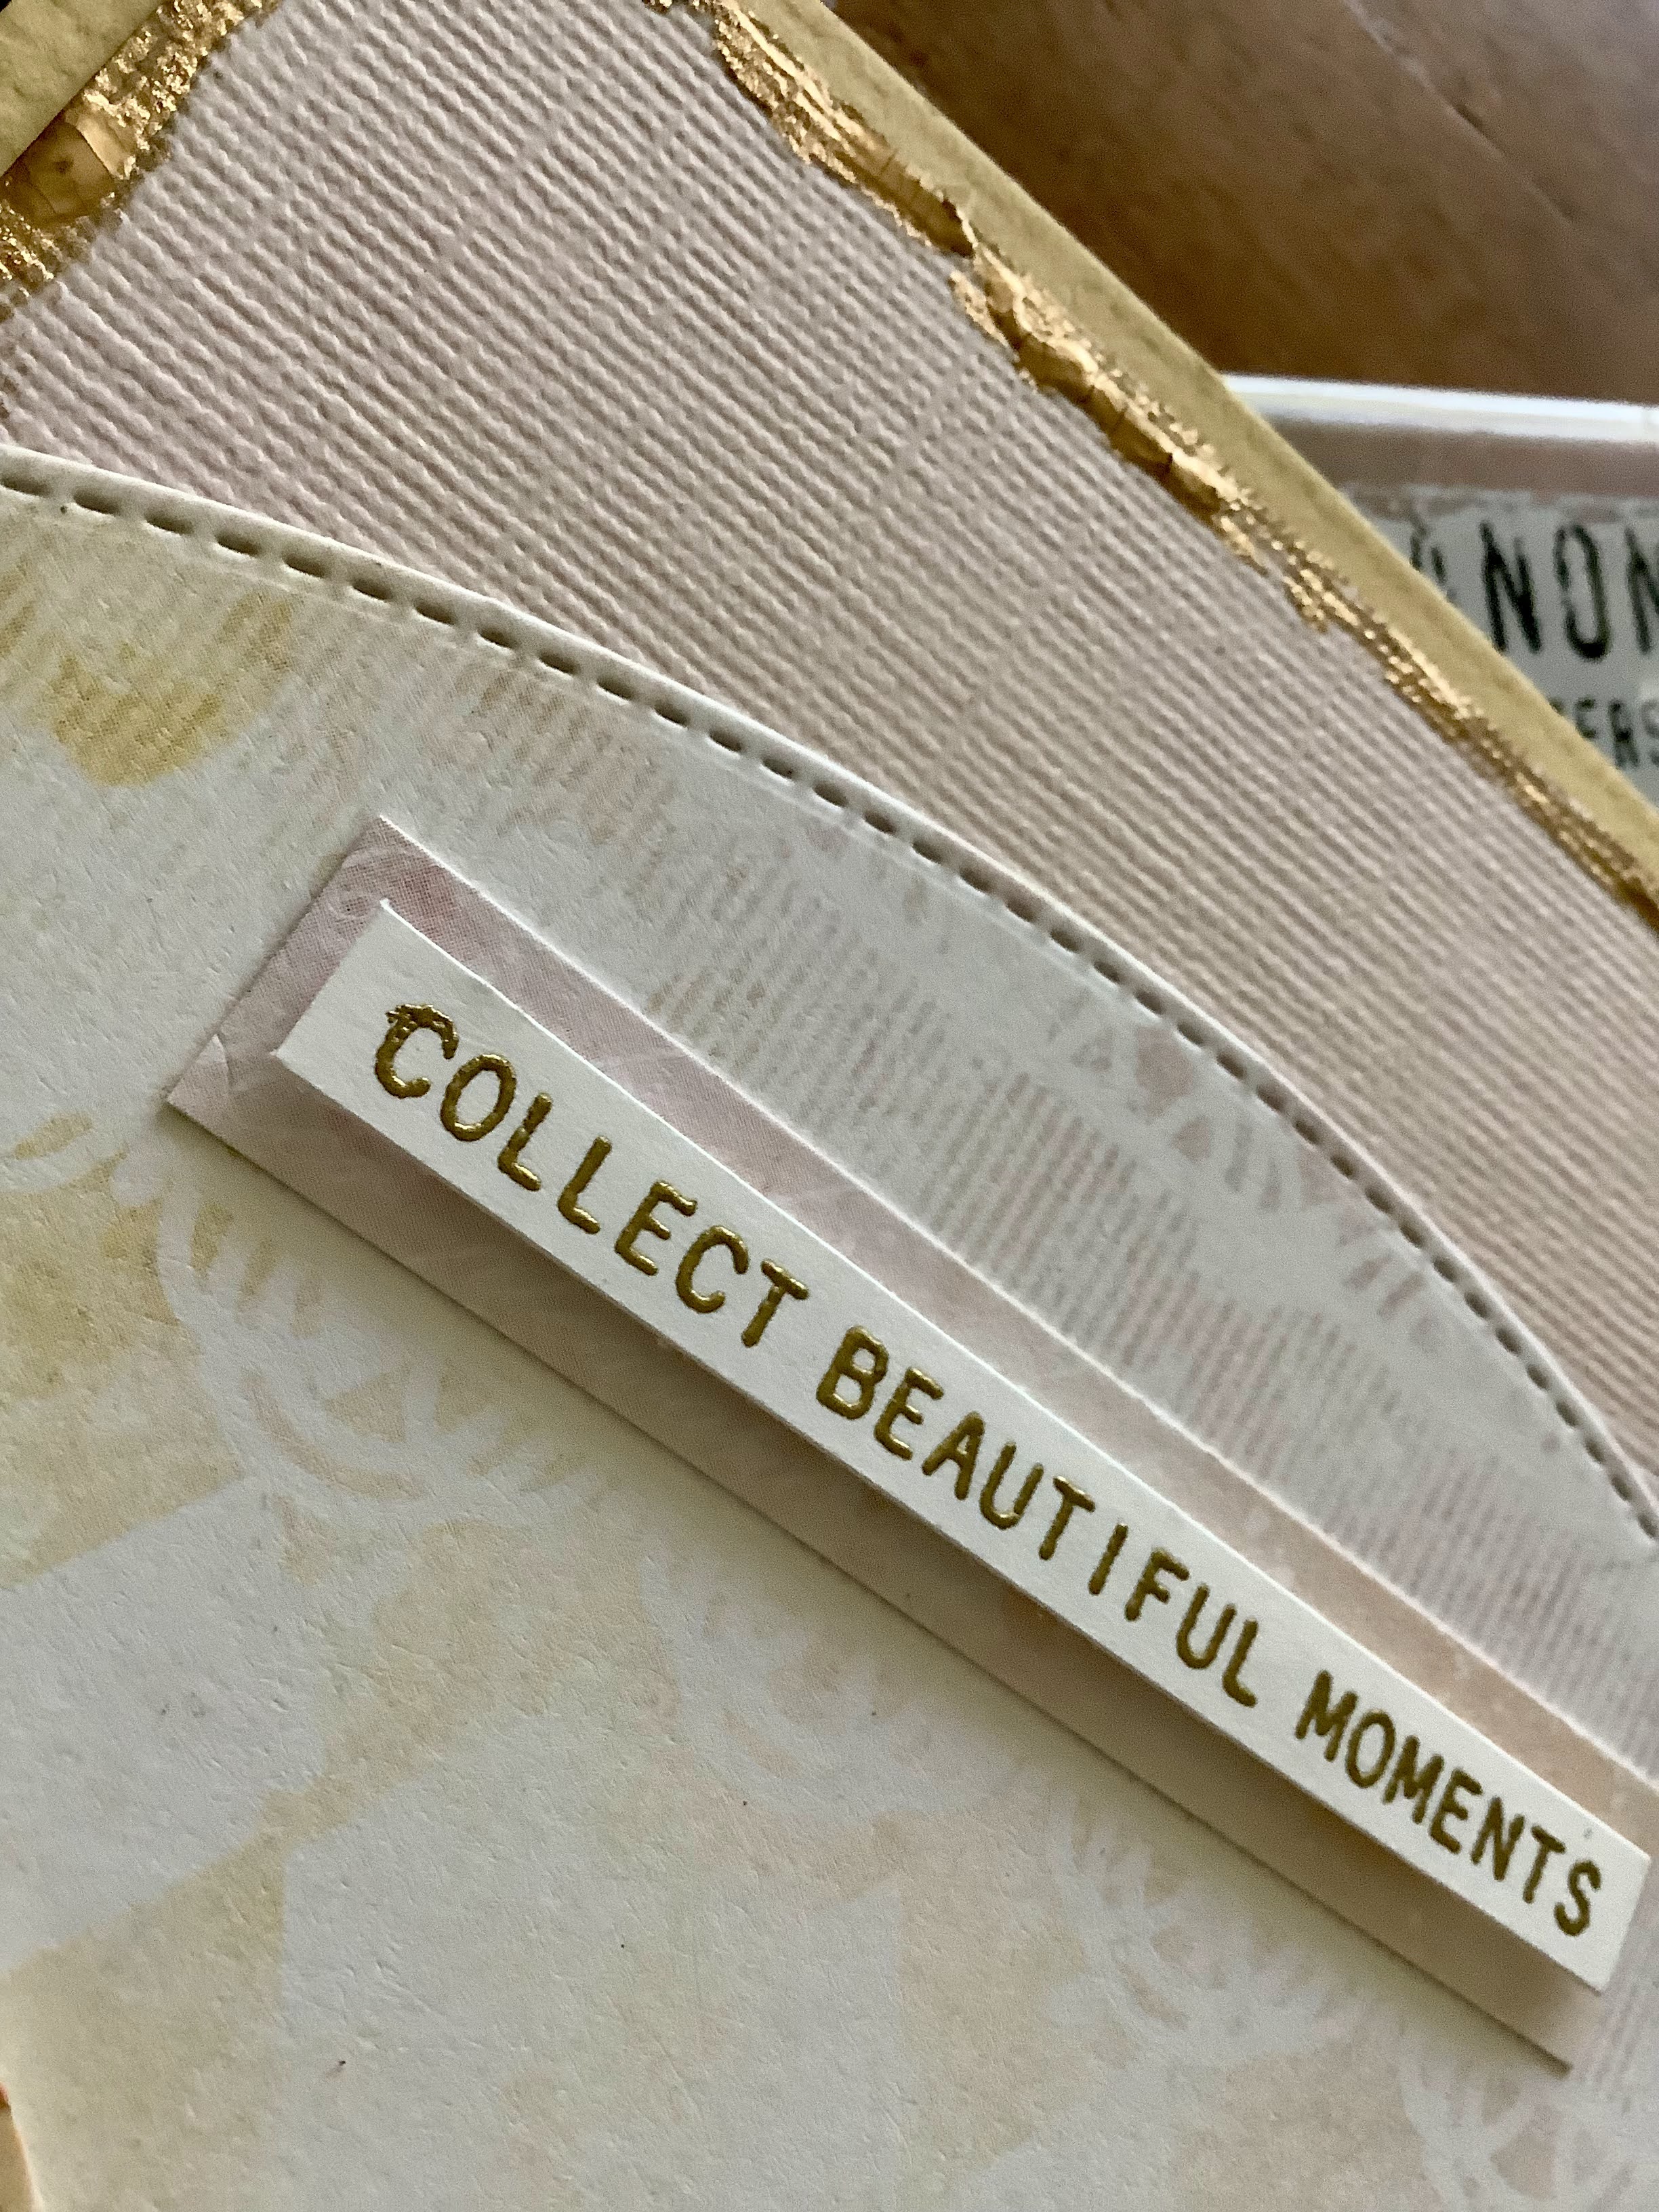
Collect beautiful moments

 Hi everyone,


Today’s card is for a bridal shower for my daughter in law to be. I thought the Doily embossing folder from Tim Holtz was perfect for the occasion.

The shower is actually a Boho picnic in the middle of lavender fields and the weather is supposed to be gorgeous.


The double arches and the stitched arch were all cut from a stitched die and patterned paper.
I blended a little Saltwater Taffy Oxide ink to the edges of the doily piece. 

I stamped the heart which is actually from an Easter stamp set with Saltwater Taffy Oxide ink and added some Distress Foundry wax to the edges of the heart and also along the top edges of the card.


The sentiment was stamped with clear embossing ink and heat set with gold embossing powder.

Well that’s it for my card and thanks so much for stopping by 🙏🏻

Supplies:
Tim Holtz 3D Texture Fades Doily embossing folder
Stamper’s Anonymous Spring Shadows stamp set
Stamper’s Anonymous Tiny Text stamp set
Distress Statue Foundry Wax
Distress Oxide ink - Saltwater Taffy 
Patterned paper

Monday, March 07, 2022

There is beauty in simplicity

 Hi everyone,

Today I have a quick and easy card to share using the Tim Holtz / Stamper’s Anonymous stamp setwhich includes some great sentiments. I just love this large perspective butterfly.


I started by ink blending my background with Distress Oxide inks and then stamped the butterfly with black ink slightly off the card.

I stamped the sentiment with Versamark ink and heat set with gold embossing powder.

I added black flecks of paint and that’s it for my card.

Thanks so much for stopping by🙏🏻

Supplies:
Tim Holtz / Stamper’s Anonymous Perspective
Distress Oxide inks - Squeezed Lemonade, Twisted Citron, Peacock Feathers 
Gold embossing powder

Monday, November 22, 2021

Peace & Joy

 Hi everyone, 

Today I have a stencilled card to share with you.

I used a new stencil from Vicki Boutin and some Distress inks.


I adhered my stencil to a piece of white card stock and starting from the centre of the stencil blending first the purple colour and then blending a blue ink colour to the edges.

Once I was finished with the blending I ran my piece through my die cut machine using a stitched rectangle die.

I added my panel to a white card base and added a sequin to the centre of where each of the star design meets.

The sentiment was stamped onto a piece of black card stock and heat embossed with silver embossing powder.

Well that’s it for this card and thanks so much for stopping by 🙏🏻

Supplies:
Vicki Boutin Warm Wishes stencil set
Pinkfresh Studio Perfect Sentiments - Holiday stamp and die
Simon Says Stamp Stitched Rectangle die 
Distress inks - Wilted Violet, Blueprint Sketch 
Silver embossing powder 
Sequins - Studio Majestic Confetti 


Friday, October 29, 2021

Hello sunshine

 Hi everyone 🍁

Well Fall is definitely in the air and so are all the beautiful leaf colours.

Today I have a card to share for the current Simon Says Stamp IG challenge and also their Wednesday challenge.


I die cut a piece of 80 lb card stock with a large stitched rectangle die.

I then used a leaf stencil set to create my background blending 2 different colours of Distress ink. When the panel was dry I added stencil paste over one of the stencils to add sparkle to only some of the leaves.

I die cut 2 small leaves and blended with Distress inks and then heat embossed the edges with gold embossing powder.

The centre sentiment piece was stamped with Versamark and also heat embossed with gold embossing powder.

I mounted the panel and the sentiment to my card base of yellow card stock with foam tape and adhered the leaves directly.

Well that’s it for my card and thanks so much for stopping by 🙏🏻 🍁 

Supplies:
Simon Says Stamp stitched rectangle die set
Lawn Fawn Fall Leaves Background stencils 
Lawn Fawn Magic Messages stamp set
Lawn Fawn Fairy Dust stencil paste 
Distress Oxide inks - Candied Apple, Fossilized Amber
Leaf - Lawn Fawn Magic Iris Fall Leaves add-on die


Tuesday, October 26, 2021

Merry & Bright

 Hi everyone,

Well today I have my first Christmas card for this year to share with you.


I started by layering each stencil at a time and blending the colour with my lightest shade of ink working to the darkest shade.

Before adding my finished piece to my card base I decided to heat embossed the edges with red glitter embossing powder.

I stamped my sentiment with Versamark ink and heat embossed with white embossing powder.

I added the panel directly to my card base and foam mounted the sentiment.

To finish the card off I added some red Stickles to some of the red berries.

Well that’s it for my card and thanks so much for stopping by 🙏🏻

Supplies:

Pinkfresh Studio Holiday Botanical Background stencil set
Pinkfresh Studio Perfect Sentiments: Holiday stamp and die
Pinkfresh Studio ink cubes - Fresh Pear, Grassy Knoll, Key Lime
Lawn Fawn Lobster ink
Stickles Xmas Red
Red embossing glitter


Thursday, October 07, 2021

Boo card

 Hi everyone,

Today’s card is just the beginning of my Halloween cards for this year.


I started by ink blending my background with 2 different colours of Distress ink.
I die cut the circle background from a piece of black card stock. I stamped the images and coloured with Copics.

I decided to add a little sparkle to the card base by inking the edges with Versamark ink and embossing with Black Diamond embossing powder.

I added a white panel to my card followed by the ink blended panel and then the circle die last.

The BOO letters were die cut with black card stock twice. One set I left black and the other set I added some metallic ink over top.

I stamped Boo in each corner circle then added all my other elements with foam tape.

Well that’s it for my card and thanks so much for stopping by.

Supplies:
Studio Katia Dotted Patterns Loops die
Lawn Fawn Oliver’s Stitched ABC’s die set
Mama Elephant Little Boo Agenda stamp set
Distress ink - Carved Pumpkin, Wilted Violet


Thursday, August 05, 2021

Rainbow raindrops

 Hi everyone,

Today I have a card to share for the August Simon Says Stamp IG challenge where the theme is to use a stencil.


I used the Raindrop stencil and ink blended a bunch of Distress inks in rainbow order onto white card stock.

The sentiment and word die are from Altenew. I die cut the word from white vellum and stamped over top with a mix of blue and purple Distress inks to follow the order of the raindrop colours on the card. I also heat embossed it with clear embossing powder.

The sentiment was stamped on black card stock and embossed with white embossing powder.

I used a rainbow paper from Lawn Fawn to cover my card base and adhered the blended panel with foam tape and added the word sentiment with foam tape also.

Well that’s it for my card and thanks so much for stopping by 🙏🏻

Supplies:
Simon Says Stamp Raindrops stencil
Altenew Halftone Smile stamp set and die
Distress inks 
Lawn Fawn Really Rainbow 6x6” paper pack
White and clear embossing powders

Thursday, March 18, 2021

Hello my beloved friend

 Hi everyone,

Well Spring is right around the corner and so are the flowers. I thought this card would brighten any day.


I started by stamping my flower image and embossing it with clear embossing powder as I wanted to watercolour it. I used se real different colours of my Zig markers.

When I had finished colouring I fussy cut the image. I set that aside and went on to creating my background. I used a stencil with some Soft Sand ink colour from Hero arts to blend over my stencil. I concentrated in the middle with a heavier blending and lightened up towards the edges. I added Versamark watermark ink and heat set with some clear embossing powder.

I die cut my sentiment die from black card stock and foam mounted to my card. The other sentiment is from Paper Rose and preprinted on black paper so I just have to cut it out.

I adhered the flower image to my stencil base with foam and the whole panel was added to a colour panel and then onto my card.

A few sequins were added and that completes my card.

Thanks so much for stopping by 🙏🏻

Supplies:

WPlus9 Beautiful Bouquets Dahlias stamp set
Papertrey Ink Wet Paint die cuts
The Crafters Workshop Mini Quatrefoil stencil
Paper Rose black & white sentiment sheets 
Hero Arts Soft Sand Shadow Ink
Zig real brush markers
Versamark ink 
Clear embossing powder 


Saturday, March 13, 2021

Wishing we lived closer

 Hi everyone,

Today I have a card to share which I created with my daughter in mind who lives in Hawaii. The sentiment is perfect because that is exactly how I feel. Especially that my 2 year old granddaughter is there too and I miss them both so much!

Entering this in the current Simon Says Stamp Wednesday challenge.


I started by laying my first stencil down and blending green ink over top. I laid down my second stencil and applied blue ink. I cleaned off both stencils and laid down the 2nd stencil over a sod applied glitter gel.

I put that aside to dry and die cut my word die twice with black card stock and inked up a white piece of card stock with Cracked Pistachio Oxide ink and die cut the word. I added some Versamark over the word and added some embossing powder. It gave it a nice glossy finish.

The sentiment was stamped onto black card stock and embossed with white embossing powder and foam mounted.

I die cut  scalloped frame to go over my card panel.

The whole panel was added to my card with some foam tape and that completes my card.

Thanks so much for stopping by 🙏🏻

Supplies:
Lawn Fawn Bayou stencils
Simon Says Stamp Sending and Wishing stamp set and die
MFT Die-namics Stitched Rectangle Scalloped Frame die set
Distress Oxide inks - Cracked Pistachio, Tumbled Glass 
Distress Ink - Twisted Citron
Versamark Watermark ink
Gina K glitz glitter gel- white
Hero Arts Sparkle embossing powder 


Tuesday, March 09, 2021

Be yourself

 Hi everyone,

Today I have a card to share using an oldie but goodie stamp from Hero Arts - Leafy Vines.


I started by creating my watercolour background with several colours of Distress inks. When the panel was dry I added some flicks of gold paint.

I inked up my stamp with black ink in my Misti and stamped it 2-3 times to get a nice dark image.

I die cut the word die 3 times and glued them together. I stamped the word sentiment with Versamark ink and heat embossed with white embossing powder.

I used foam tape and mounted the panel to my white card base.

Well that’s if for my card and thanks so much for stopping by 🙏🏻

Supplies:

Hero Arts Leafy Vines stamp
Simon Says Stamp Be die
Lawn Fawn Village Shops stamp set 
Distress inks - Mustard Seed, Salty Ocean, Twisted Citron, Mowed Lawn
Tambi Gansai paint


Thursday, March 04, 2021

Happy Spring

 Hi everyone,

Well Spring is just around the corner so I have a colourful Spring card to share which is also for the current Simon Says Stamp IG challenge.


I actually embossed the background onto a piece of white card stock using a Simon Says Stamp stencil.
When that was done I left the stencil in place and started to blend my colours with Oxide inks.

After the blending was done I cleaned the ink off my stencil. I placed the stencil over top again and added Versamark ink to the dot and swirl pattern of the background carefully masking off as I went. I the added Hero Arts sparkle embossing powder to each section and heat embossed.

I thought it would just add a little something to my background.

I used a die to cut the word a couple of times and glued them together. I stamped the spring sentiment using a multi colour ink pad.

I adhered the panel onto a piece of turquoise card stock and added to my card base. I added foam tape
to the stamped word and that completes my card.

Thanks so much for stopping by 🙏🏻

Supplies:
Simon Says Stamp Swirls and Dots stencil
Clearly Besotted Happy die
Lawn Fawn sentiment from Say What? Spring Critters 
Distress Oxides - Squeezed Lemonade, Lucky Clover
Hero Arts Sparkle embossing powder 


Thursday, February 18, 2021

For you

Hi everyone,

I have a fun card to share using a large background stamp, 2 Distress re-inkers (embarrassed to say the only 2 I own) ☺️ and Gansai Tambi gold paint.


I started by stamping my large floral background stamp with Versamark ink onto a piece of watercolour card stock that had been cut with a rectangle stitched die.

I then heat embossed it with textured white embossing powder from Lawn Fawn. 

I used drops of re-inkers in 2 different colours and then added some water. I moved the panel around so I could disperse the colours over the panel. I then added a bit of gold paint in different areas for a nice bit of shine here and there.

I was quite happy with the way the panel turned out as it looks nice and aged.

I die cut the large sentiment from some shiny gold card stock. The other sentiment was cut from the black & white sentiment sheets pack from Paper Rose.

I added the panel with foam tape to a stitched scalloped panel of turquoise card stock. 

Well that it for my card and thanks so much for stopping by 🙏🏻

Supplies:
Simon Says Stamp Stitched Rectangle die set 
My Favorite Things Floral Fantasy Background stamp
Lawn Fawn Outside In Stitched Rectangle Stackables die set
Lawn Fawn For You die
Distress re-inkers - Tumbled Glass & Shabby Shutters
Lawn Fawn Textured White embossing powder 
Paper Rose sentiment sheets pack
Gansai Tambi Bluish Gold paint
Versamark watermark ink pad


Monday, January 04, 2021

Winter Trees

 Hi everyone,

Today I have a card to share using an older Hero Arts stamp called Winter Trees.


I started by stamping the image using a tri-colour ink pad. When dry I stamped over the image again with Versamark clear ink and embossed with Psychedelic glitter powder. It added such a rainbow of colour to my image.

The sentiment was stamped directly to the bottom of the card. I decided last minute to add a die cut stitched rectangle border around the image. In doing so, it cut off part of the word winter.

I had to fix this by stamping the words winter cheer onto a strip of white card stock and foam taping it over the 2 original stamped words. Seemed to have fixed my issue. Yeah!

I die cut a tiny snowflake from a piece of Holographic paper and added that to my card.

Well that’s if my for card and thanks so much for stopping by 🙏🏻

Supplies:
Hero Arts Winter Trees 
Simon Says Stamp Stitched Rectangle die set 
Honey Bee Sending You Sentiments stamp set
Lawn Fawn Mini snowflake die set
Hero Arts Ombré Mint to Green ink pad
Psychedelic embossing powder
Versafine black ink

Friday, December 04, 2020

Joy

 Hi everyone,

Today I have a card to share using an old Hero Arts wood block Christmas tree stamp that I have.


I started by stamping the image with green ink and heat embossing with clear embossing powder.
I used a stitched rectangle die to cut my panel.

The letters were die cut from some striped paper. 

I layered my stamped panel onto a piece of patterned cardstock and foam mounted the letters at the bottom.

I added a little silver star embellishment to the top of the tree and that completes my card.

Thanks so much for stopping by. 

Supplies:

Hero Arts tree stamp - H5629
Simon Says Stamp Stitched Rectangle die set
Lawn Fawn Oliver's Stitched ABCs die set
Simon Says Stamp Lucky mini ink cube
Lawn Fawn Let It Shine 6 x 6 paper pack


Tuesday, November 24, 2020

Celebrate the season

 Hi everyone,

Today I have a card to share using a couple of stencils and some embossing paste. It was difficult to capture the beautiful sparkle of the paste with the lighting I had on the day I took the photo but it really is quite pretty 🤩 


I started with the tree stencil first and applied some Gina K glitter gel on to a piece of wood grain card stock. I set that aside to dry and went on to die cutting 3 tiny birds from some red card stock.

Once the first stencil piece was dry I carefully added a snow stencil to my piece and added some distress paste.

I mounted the panel with foam tape on to a piece of black card stock and then added that to my card.

The sentiment was heat embossed with white embossing powder and added to my card with foam tape.

I popped up the little bird with a small foam dot and that completes my card.

Thanks so much for stopping by 🙏🏻

Supplies:

Newton’s Nook Evergreens stencil
Lawn Fawn Snowy Sky stencil
Lawn Fawn Tree die set
Simon Says Stamp Stitched Rectangle die 
My Favorite Things Bitty Holiday Wishes stamp set
Gina K White Glitter Glitz gel
Tim Holtz Distress grit paste


Thursday, November 12, 2020

Christmas ornaments

 Hi everyone,

Today I have a card to share that I created using mostly Sunny Studio Stamps products.


I started by stamping the 3 ornaments in 2 different shades of blue ink from Altenew. I didn’t have the matching die so I had to fussy cut them out.

The branch was stamped and die cut with the matching die. The sentiment was stamped and heat embossed with gold embossing powder. Also I didn’t have the matching die so I fussy cut this too.

I used a large rectangle die to cut a piece of Lawn Fawn patterned paper for my background. The panel was adhered directly to my card with glue. All the other pieces were added with foam tape.

Before I added the ornaments to my card I poked a little hole in the branches and added gold thread to hang them from. I also added some Stickles glitter to the branches.

Well that’s it for this card and thanks so much for stopping by 🙏🏻

Supplies:
Sunny Studio Retro Ornament stamp set
Sunny Studio Holiday Style stamp and die sets
Sunny Studio Season’s Greetings stamp set
MFT Die-namics In & Out Diagonal Stitched Rectangle die set
Altenew mini ink cubes - Persian Blue & Sapphire
Lawn Fawn Spiffy Speckles 6 x 6 paper pad
Gold embossing powder
Stickles

Tuesday, November 03, 2020

Merry snowflakes

 Hi everyone,

Today I have a card to share using the new Lawn Fawn Snowflake border die and Simon Says Stamp Merry Frame die.


I started by die cutting 3 Snowflake border twice and piecing them together over a strip of pink 
card stock.
The Merry sentiment was die cut with shiny silver card stock and adhered to the white die cut panel.
The word Christmas was stamped and heat embossed with silver embossing powder.

I added a strip of pink card stock to each side of my card and then adhered the sentiments with foam tape.

Well that’s it for this card and thanks so much for stopping by 🙏🏻

Supplies:
Lawn Fawn Snowflake Border die
Lawn Fawn Cheery Christmas stamp set
Simon Says Stamp Merry Frame die set
Glitter card stock 
Silver embossing powder
Shiny silver card stock

Sunday, June 14, 2020

Neon Hello

Hi everyone,

Today I have a card to share that I will be entering into Simon Says Stamp current "Anything Goes" theme on Flickr. You can find it here 


I started by colour blending 3 different colours of Hero Arts Neon ink cubes.

It is a bit tricky to blend over this stencil because the lines are very thin but I think it all worked out.

Once I was finished with the blending I die cut the hello 3 times with black cardstock. I applied watermark ink to the top layer of the sentiment and added some clear embossing powder so I could have a shiny look to my sentiment.

I added some splatters with black paint and then added the Hello to the centre of my panel.

Onto the card base I added 2 strips of neon washi tape at the top and bottom and then adhered my panel to the card.

Well that's it for my card which was quite simple to make.

Thanks so much for stopping by.

Supplies:

Simon Says Stamp Flora stencil
Simon Says Stamp Painted Hello die
Hero Arts Neon Green, Neon Pink and Neon Orange ink cubes
Gansai Tambi black paint
Washi tape

Sunday, May 31, 2020

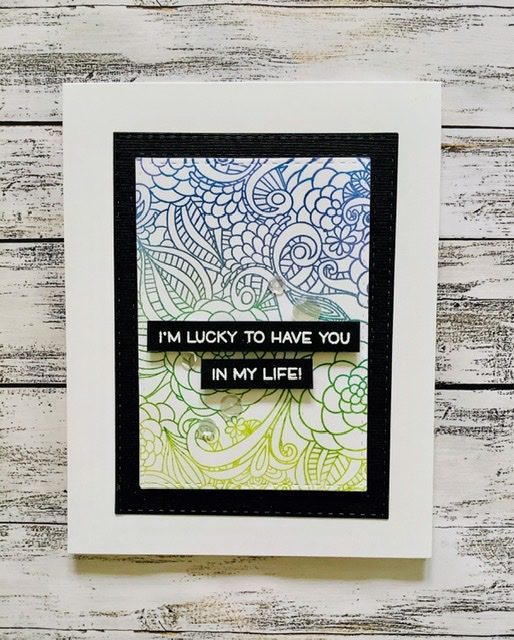
Lucky to have you

Hi everyone,

Today I have a card to share using the large Floral Fantasy background stamp from MFT stamps.


I started by setting the stamp in my Misti rubber side up in the platform. I taped my die cut rectangle piece to the door of my Misti aligning it to the centre of the stamp. I used a Kaleidacolor ink pad which has 5 different colours of ink and inked up the stamp. I had to do this several times in order to get a crisp image. I did use a different ink on the top portion as I wanted to have a dark blue colour with the greens.

I used 2 of the stitched rectangle dies to make the frame for my image from some black cardstock. The sentiment was stamped and embossed with white embossing powder.

I popped both the background and the sentiment pieces with foam tape.

I added a few clear sequins and that completes my card.

Thanks so much for stopping by.

Supplies:

MFT stamps Floral Fantasy Background Stamp
Lawn Fawn Reveal Wheel Friends & Family sentiments Stamp set
Simon Says Stamps Stitched Rectangle die set
Tsukineko Kaleidacolor Fresh Greens ink pad